GBCORP BLOG · SUSTAINABILITY
How to Install Rollable Solar Panels on a Roof, RV or Boat
Rollable solar panels can go up in an afternoon, but how long they last is decided before the first bead of adhesive goes down. This guide takes you from site survey to first charge on roofs, RVs, boats, fabric and curved structures, using what manufacturers’ installation manuals actually ask for.
To install rollable solar panels, start with a rigid, clean surface whose curve is gentler than the panel’s minimum bend radius. Bond the panel with outdoor adhesive on hard surfaces, or tie it down through its eyelets on fabric. Then seal the cable entry, wire to a charge controller rated for the panel’s cold-morning voltage, fuse the battery side and test.
The panel’s own manual always comes first; what follows is the common ground across manufacturers’ instructions. Anything connected to a building’s mains or the grid needs a qualified electrician working to local electrical code.
Before you start: five checks
- Know your panel type. Thin-film rollables are made to be rolled; one maker asks only for an inner roll at least 3 inches (76 mm) across, solar side out. Semi-flexible crystalline panels bend once, at installation, to a minimum radius of roughly 1 m to 3 m in the manuals we checked.
- Measure the curve. Curved solar panels need an even curve with no kinks over frames or crossbars. For a panel 1 m long, a 3 m minimum radius allows an arch of at most 42 mm, and a 1 m radius allows 122 mm.
- Check the load path. Semi-flexible panels need a rigid, sound backing that fixings can bite into; they are not made to flex in the wind like a sail.
- Track sun and shade. Masts, rigging, vents and roof boxes cast moving shadows, and even partial shade cuts output substantially.
- Plan for heat. A peer-reviewed study from 2018 puts the typical loss for crystalline silicon at about 0.45% of power per degree above 25 °C, and estimated that a rooftop module at 92 °C in a desert gives about 30% less than under standard test conditions. A panel glued flat to a dark roof has no air behind it, so prefer paler or better-ventilated spots.
Step by step
1. Survey and lay out
Dry-fit before anything sticks. Mark the outline with masking tape, check the cable reaches its entry point, and leave at least 2 mm between panels, or beside a skylight, for thermal expansion, as one manual asks. In full sun, check open-circuit voltage and current against the datasheet: a bonded panel is very hard to return.
2. Prepare the surface
One manual for adhesive-backed panels specifies 99% isopropyl alcohol, a light scuff of the roof’s clear coat and a second wipe. It asks for 4 °C to 27 °C, out of direct sun, then 24 hours at bonding temperature. Fill deep ridges, as on some van roofs, and never sand the back of the panel.
3. Fix the panel
- Adhesive for metal, fibreglass and approved membrane roofs: use an outdoor product that bonds to both the surface and the panel’s backsheet. Lay parallel beads broken in the middle on smooth surfaces, or a full trowelled layer on ridged ones. Press from the centre out, and weight curved panels evenly while they cure, because they spring back.
- Eyelets or grommets for fabric, tents and temporary rigs: tie down every corner so wind cannot lift the panel.
- Screws, rivets or clamps for metal: drill only where the manual permits. One allows holes at the corners and edges at least 8 mm from any cell or contact, sealed before the screws are tightened.
- Tape and hook-and-loop are weak options. One manual advises against tape on curves and against hook-and-loop on vehicles and fast boats, because of spring-back and wind drag.
4. Seal the cable entry
Use a cable entry gland made for roofs or decks, bedded in a compatible sealant, with a drip loop outside. For a rear junction box, one manual has you drill a hole for the box (typically 30 mm) and lay a closed adhesive ring at least 12 mm across around it. Seal the panel edge where water pools, clip cables away from sharp, hot or moving parts, and keep cable bends wider than the manual’s limit; one sets 40 mm.
5. Wire to the controller or inverter
Open-circuit voltage rises in the cold, and one controller manual warns it will be higher below 25 °C. Use the panel’s temperature coefficient to work out the string’s voltage on the coldest morning you expect, and keep it under the MPPT controller’s maximum PV input. Connect the battery first, then the panel, and cover the panel while you work because it is live in daylight.
Where shade is likely, one marine maker prefers a controller per panel, or parallel wiring with blocking diodes, over a series string. For the battery side, see our energy storage page. Inverters feeding a building or the grid need a qualified electrician.
6. Fuse and isolate
Fuse the battery cable as the controller manual says; one panel maker suggests 1.5 times the controller’s maximum current, and sizes cables for the full loop to hold voltage drop to 3%. Add a switch that isolates the panel.
7. Test and recheck
In sun, check polarity, voltage and charging current at the controller. One manual asks for an inspection of fixings and connections within 30 days and twice a year after that.
Surface by surface
| Surface | Fixing | Watch for |
|---|---|---|
| Metal roof | Adhesive, or screws where allowed | Degrease; seal every hole |
| Membrane roof | Adhesive the membrane maker approves | Seal edges where water pools |
| RV or van roof | Full adhesive layer over filled ridges | Wind drag; a sealed cable gland |
| Boat deck or hardtop | Adhesive on a smooth, rigid deck | Walk only if rated; rinse off salt |
| Bimini or dodger | Zips, ties or sewn edges on taut canvas | No flogging; stiffen over crossbars |
| Canvas or tent | Eyelets tied at every corner | Best with thin-film rollables |
| Curved structure | Adhesive, held while it cures | Arch height within the limit |
Mistakes that shorten panel life
- Creasing or folding. Creases crack cells. Roll thin film solar side out, and never fold a panel not sold as foldable.
- Bending below the radius, including flexing a corner by hand to test it, which one manual says can easily crack cells.
- Drilling outside the permitted zones, which risks delamination, corrosion and exposed live parts.
- No airflow on hot surfaces. Heat costs output and, as the US Department of Energy notes, shortens operating life.
- Walking on panels not rated for it. One marine maker rules it out for removable or screw-fixed installs.
- Shade from rigging or roof boxes. A fully shaded cell can form a hot spot above 200 °C, one manual warns.
Care and maintenance
Rinse with fresh water and wipe with a soft cloth, adding mild soap only if your manual allows it; no brushes, scrapers or pressure washers. Lift salt off gently so crystals do not scratch, and clear snow with a soft broom. At least once a year, check fixings and connections for tightness and corrosion, and reseal cracked edges. Never paint or coat the panel.
Where to read more
Still choosing between adhesive and eyelet mounting, or weighing lifespan? The flexible solar buying guide covers both. Solar Without a Roof explains where flexible panels beat rigid ones, and our flexible rollable explainer covers the basics.
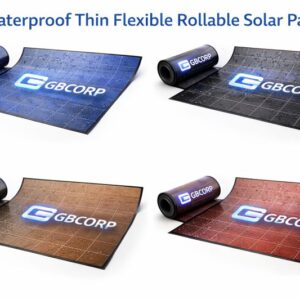
For boats, RVs, containers and curved roofs, the GBCORP Waterproof Thin Flexible Rollable Solar Panel is an ultra-thin laminate with marine-grade waterproof encapsulation. It mounts by adhesive, bolt, clamp or grommet, and rolls into a tube.
Questions we hear first
How do you attach rollable solar panels to a roof?
Most are bonded with an outdoor adhesive that suits both the roof and the panel’s backsheet, after degreasing. On metal, screws or rivets also work, but only where the manual permits, with every hole sealed.
Can you roll up solar panels after they are installed?
Only thin-film panels made for rolling, and only if they were tied or clipped on rather than glued. Pulling off a bonded semi-flexible panel can crack its cells.
Do roll out solar panels on a roof need an air gap?
Most are bonded flat with no gap, which is why heat matters: crystalline cells lose about 0.45% of output per degree above 25 °C. Choose a paler or better-ventilated spot, and follow any ventilation rule in the manual.
Can you walk on flexible solar panels on a boat?
Only if the manual says so. One marine maker allows it only when the panel is fully bonded to a flat, smooth, rigid deck and you wear soft soles.
How tight can you bend a rollable solar panel?
It depends on the product: one thin-film rollable rolls to an inner roll 3 inches across, while the semi-flexible panels we checked need a radius of roughly 1 m to 3 m. Treat the manual’s figure as a limit, not a target.
GBCORP operates across 17 countries on 4 continents through six pillars: AI & IT, Innovation, Sustainability, Infrastructure, Business Lounge, and EV's & Solutions.